

|
|
- In Naval Arena: Stillwater Gulf, all participants are competing against each other and you must defeat all other participants to win.
- Participants must survive by summoning their clippers and they cannot get off the clipper once they board it.
- Make sure to be close to a safe area with Ezi's Divine Protection, when the wave of Greedy Shadows moves in.
- Exploring the map and defeating monsters allows the participants to find supplies, which then can be used to enhance their clippers.
- The arena lasts for 60 minutes, but the Greedy Shadows move fast and will reach you before that.
- All kinds of chats are prohibited in the arena due to the curse of the ghosts.
- Participants fight under the same conditions, all active buffs and debuffs are canceled and won't be restored even after you leave.
|
|
Naval Arena: Stillwater Gulf can support up to 50 participants and will be available for a certain period of time.
|
|
|
|
|
|
|
|
|
|
|
|
|
|
|
|
|
|
|
|
|
|
|
|
|
|
- The event banner will appear on the top right side of the screen at the entry time. Click on the banner to open the Instance window.
- Anyone of at least level 30 can apply to enter the arena through Instance > Arena (Shift + ;) at the entry time.
- You cannot enter the arena while under a debuff, such as when forcibly awaiting trial, participating in a trial, being a prisoner, carrying a trade pack, etc.
- You may still participate in the arena once you're out of entries.
- However, you will not earn Instance Rewards while all results will still be included in your ranking.
- You can reset your daily entries up to the number of times shown.
|
|

|
|
|
|
|
|
Crescent Bay |
|
|
|
Harvest Ridge |
|
|
|
Sinking Waters |
|
|
|
Greed Islands |
|
- Large Shipwrecks are scattered around all areas.
- A Large Shipwreck contains supplies of a max. of Legendary grade.
Elements of the Arena: Supplies
- Players can acquire a variety of helpful effects and consumables upon acquiring supplies.
- There are 4 levels of supplies: Standard, Advanced, Relic, and Legendary. How you acquire them and their effects differ according to these levels.
- You can distinguish them with their colors. Earn XP to upgrade the clippers and select a Special Skill.
Supplies
- Earns 100 Ship XP.
- Can acquire a large quantity of supplies with the Ship Skill within a determined scope.
Advanced Supplies
- Earns 200 Ship XP.
- Produces 1 Special Skill option.
Relic Supplies
- Earns 300 Ship XP.
- Produces 2 Special Skill options.
- Acquires Naval Commendation x1.
Legendary Supplies
- Earns 500 Ship XP.
- Produces 3 Special Skill options.
- Acquires Naval Commendation x2.
Lucky Supplies
- You can rarely find this supply.
- You might get unexpectedly lucky upon its acquisition.
|
|
Waiting Time
- The battle starts 60 seconds after the waiting queue is over.
- Once the waiting time is over, Raging Bubble Trap is removed and you can acquire Ezi's Divine Protection that allows you to summon clippers.
- Find the right place for a battle in which you can make use of the clippers' high speed.
Battle Clipper
- You can summon a battle clipper at your desired location within 2 minutes after the waiting time is over.
- One of two battle clippers of different appearances will be randomly summoned (their performance is the same).
- You cannot get off the clipper or cancel summoning the clipper upon boarding a battle clipper.
Battle Clipper Effects & Skills
- The battle clippers of Stillwater Gulf are faster than standard clippers and have a more complex control system.
- You can fire 4 cannons while on board: 2 on the left and 2 on the right.
- You can designate a specific range for the cannon to attack. If the designated range is within the shooting range of 2 cannons, then you can fire both cannons simultaneously.
- A clipper has 5 basic skills:
|
|
|
|
|
|
|
|
|
|
|
|
|
|
|
|
|
|
Enhanced Battle Clipper Performance
- Earn XP through supply acquisition and increase the level of the battle clipper.
- You can enhance 4 elements of a clipper's performance. The enhancement rank of each element randomly increases as the clipper level increases.
- (Clipper skill rank increases by 1 whenever your clipper level reaches 5, 10, and 15.)
- Enhancement effects are as below.
|
|
|
|
|
|
|
|
|
|
|
|
|
|
|
|
|
|
|
|
|
|
|
|
|
|
|
|
|
|
|
|
|
|
|
|
|
|
|
|
|
|
|
|
|
|
|
|
|
|
|
|
|
|
|
|
|
|
|
|
|
|
|
|
|
|
|
|
Enhanced Special Skills
- You can obtain 6 types of Special Skills in the Arena (you can only have 1 at a time).
- You can obtain Special Skills through supplies, and you can change your Special Skill by obtaining one again.
- Special Skills become more effective as the Clipper Skill's rank increases.
|
|
|
|
|
|
|
|
|
|
|
|
|
|
|
|
|
|
|
|
|
|
|
|
|
|
|
|
Natural Disasters
- Natural disasters will randomly appear in the Arena.
- You can use natural disasters to your advantage. Use them for various tactics.
Poison Cloud
- Amount of damage dealt is in proportion to the Ship's HP.
- Don't panic and quickly escape from the poison.
Waterspout
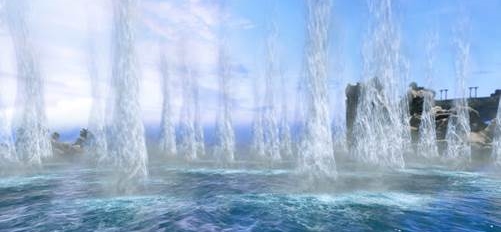
- It's stronger than the ones that appear in Gathering Seahag.
- While these don't deal damage, they will obstruct your path.
Fireballs
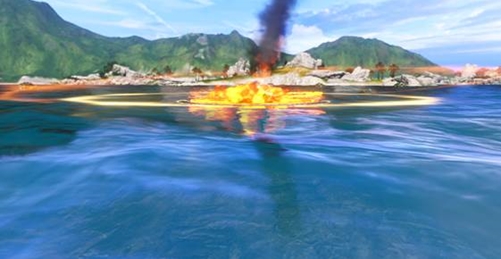
- Fireballs can fall from the sky.
- The fireballs are extremely powerful. In fact, they're so strong that they will destroy clippers on a single hit.
Clipper Growth Progress
- The Clipper's level is extremely important for survival.
- It can be leveled up to level 15. The higher the level, the better the performance.
Leveling Up
- You can gain XP through Salvage Supplies. The amount of XP you gain will depend on the grade of the supplies.
- Lucky Supplies do not provide XP.
Clipper Performance
- A clipper's performance consists of Durability, Boost, Cannon, and Special Skills.
- Performance increases as the clipper's level increases.
- Durability, Boost, and Cannon increase randomly (you cannot select a specific one to increase).
- Special Skill performance increases whenever your clipper reaches level 5, 10, or 15.
Special Skills
- You can get Special Skills by obtaining Advanced or higher grade supplies.
- Special Skills are randomly obtained. The higher the grade of the supply, the more options of Special Skills you will have.
Install Trap
- Installs an explosive trap behind the clipper.
- Higher ranks allow you to install more dangerous traps.
Barrel Bombs
- Throw 3 barrel bombs from the back of your clipper.
- Higher ranks allow you to throw barrel bombs several times.
Guided Torpedo
- Launches a guided torpedo that chases a nearby enemy.
- Higher ranks allow you to throw barrel bombs several times.
Frost Wave
- Creates a frost wave that decreases the move speed of enemies.
- Higher ranks allow you to increase the effectiveness of the frost wave.
Lightning Strike
- Calls down 5 rounds of lightning strikes in a nearby area.
- Higher ranks allow you to increase the number of strikes called down.
Caramelizing
- Throws flames from both sides of your clipper.
- Higher ranks allow you to increase the damage dealt.
Trap
- Some of the supplies are merely traps.
- If you activate a trap, your location will be exposed to everyone within the Arena.
- You can get a Legendary grade supply by killing a trapped player.
Death / Return
- Dying in the Arena will not decrease your XP or Durability.
- Dying is counted as a defeat. Once you're dead, you can leave the Arena.
Winning Condition
- The top 10 in the Arena will be considered the winners.
Rules
- Certain items such as Teleport Scrolls cannot be used.
- You can use Mounts, Battle Pets, Steamtanks, and Machines.
- You can only use the clippers provided by the Arena.
|
|
Participation Rewards
- You can get Kyrios Badges according to your rank at the end of the Arena match.
- You can get 5 Kyrios Badges for every enemy clipper you destroy.
- Rewards are sent to your Mailbox after the Arena ends.
|
|
|
|
|
|
|
|
|
|
|
|
|
|
|
|
|
|
|
|
|
|
|
|
|
|
|
|
|
|
|
|
|
|
|
|
|
|
|
|
|
|
|
|
|
|
|
|
|
|
|
Rank Rewards (All Servers)
- The ranking will be closed on July 31, 2023, 23:00 CEST (21:00 PDT).
- Characters with less than 4,000 Naval Arena points won't appear in the ranking.
|
|
|
|
|
|
|
|
|
|
|
|
|
|
|
|
|
|
|
|
|
|
|
|
- Ruler of the Sea and Bloodsalt Bay Figurehead Crate will disappear if not opened in 3 days.
- Rank rewards from between August 1, 2023 (Tue) and August 3, 2023 (Thurs) will not be distributed.